Adjusting the Upper Thread Tension
Adjusting the Upper Thread Tension with the Adjusting Dial
The upper thread tension can be adjusted using the adjusting dial thread tension. The default value for the upper thread tension is 3.
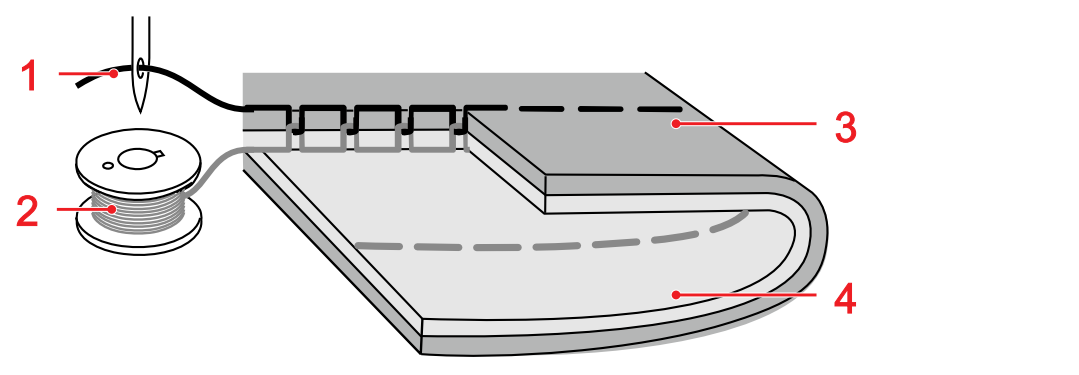
1 | Upper Thread |
2 | Bobbin Thread |
3 | Right side (top side) of the fabric |
4 | Wrong side (bottom side) of the fabric |
With an optimal straight stitch, the bobbin thread is not visible on the right side of the fabric.
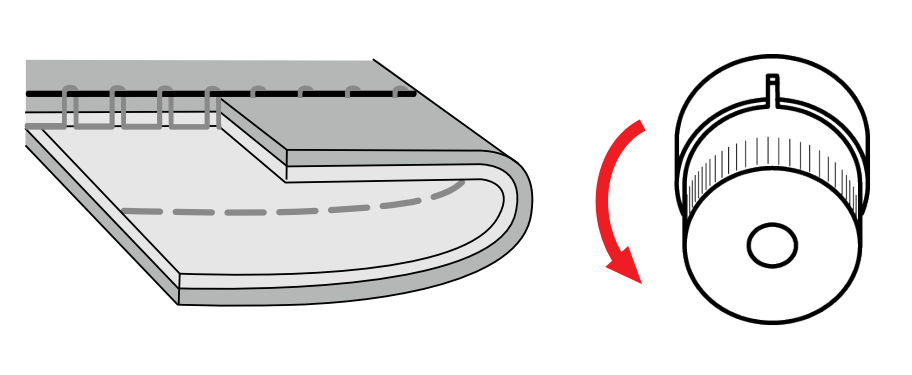
- If the bobbin thread is visible on the right side of the fabric, adjust the upper thread tension to a lower value using the adjusting wheel.
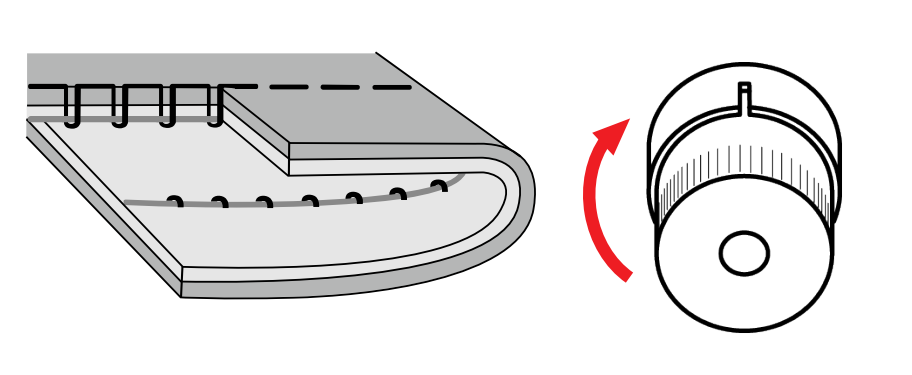
- If the upper thread is visible on the wrong side of the fabric, adjust the upper thread tension to a higher value using the adjusting wheel.
Adjusting the Upper Thread Tension in the Thread Guide (Thicker Threads)
Additionally, the upper thread tension can be altered by moving the adjustment plate.
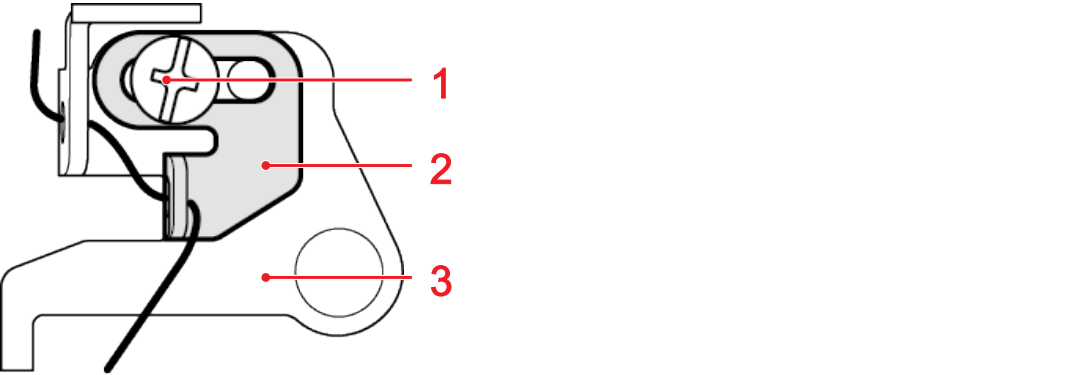
1 | Fixing Screw |
2 | Adjustment Plate |
3 | Thread Guide |
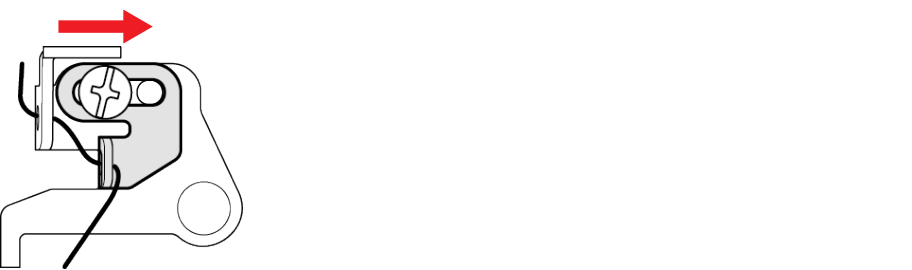
- To reduce the upper thread tension, loosen the fixing screw, slide the adjustment plate to the left and tighten the fixing screw.

- To increase the upper thread tension, loosen the fixing screw, slide the adjustment plate to the right and tighten the fixing screw.
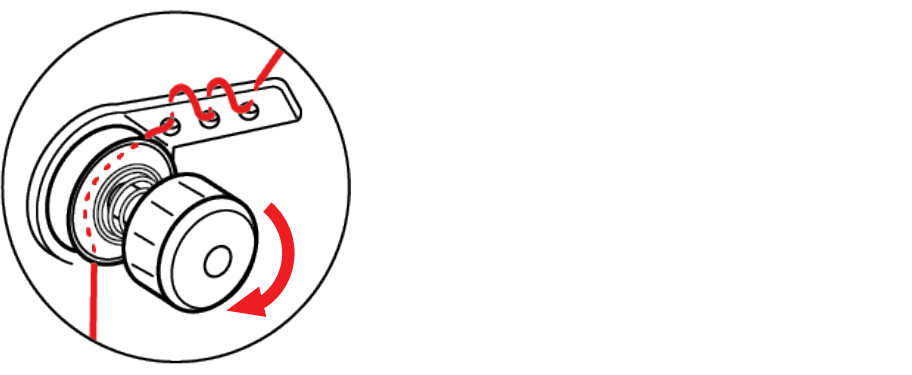
Adjusting the Upper Thread Tension in the Thread Pretension
Additionally, the upper thread tension can be altered by turning the adjusting wheel Thread Pretension. By turning, the tension between the thread tension discs is changed. The default setting specifies that the screw head sinks about 4 mm (1/8 to 3/16˝) into the adjusting wheel.
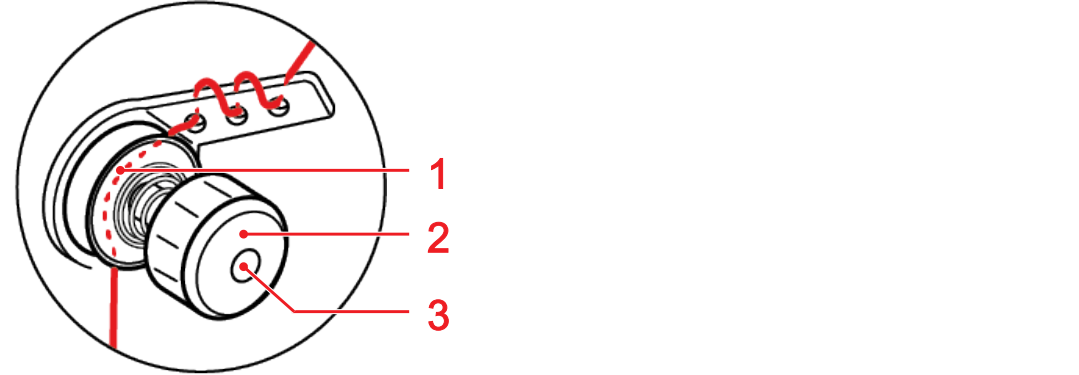
1 | Thread Tension Discs |
2 | Thread Pretension Dial |
3 | Screw Head |
- To reduce the upper thread tension, turn the adjusting wheel counterclockwise.
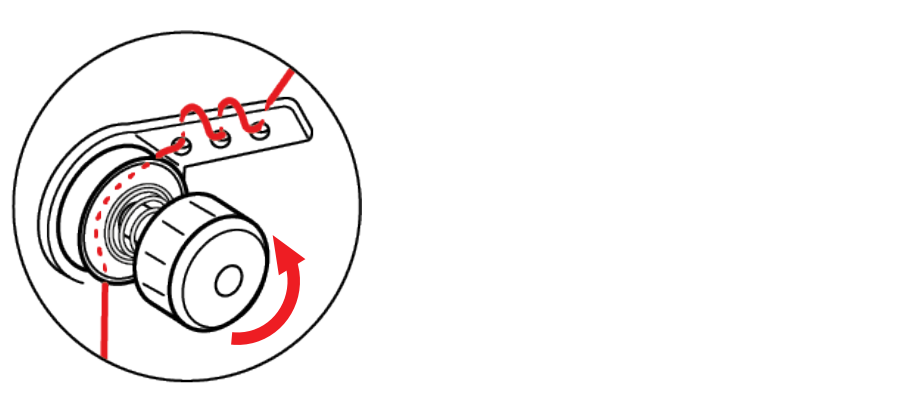
- To increase the upper thread tension, turn the adjusting wheel clockwise.