Threading the Single Needle
Notifications on the Needle Threader
- The needle threader only works for threading a single needle. Always thread twin needles and triple needles by hand.
- The needle threader can be used for needles from size 70 upwards. Thread thinner needles by hand.
For a proper seam and to avoid “thread tangles”, you must thread the upper thread correctly.
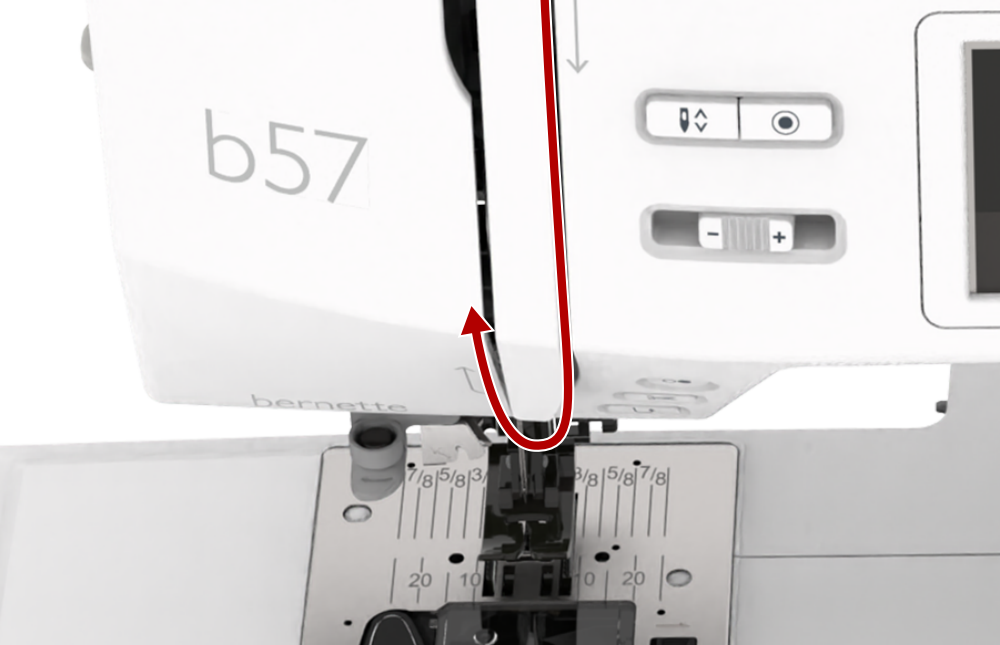
The thread path for threading is marked on the machine with drawn-through arrows.
- Raise the presser foot so that the thread tension discs are open and the thread can slide easily between them.
- Raise the needle so that the thread can be easily inserted into the thread take-up lever.
- Lock the screen.
- Place a felt pad on the horizontal spool pin.
- Place the thread spool on the spool pin.
- Select a spool cap with the same diameter as the spool and place it on the spool pin. The spool should not rotate. The thread should unwind properly.
- For slippery threads put a spool net over the spool as an additional measure.
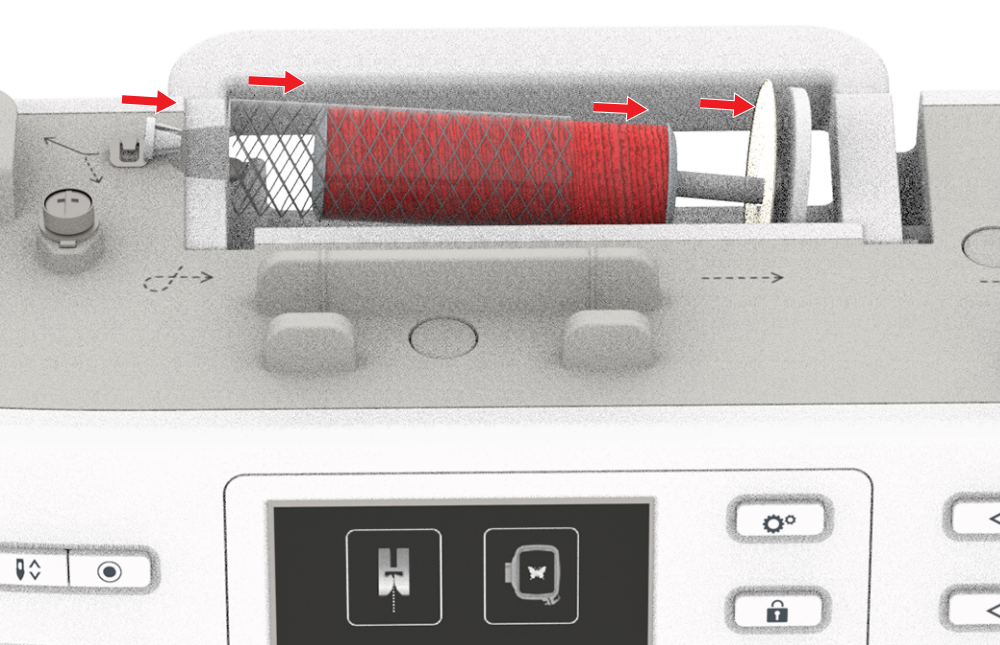
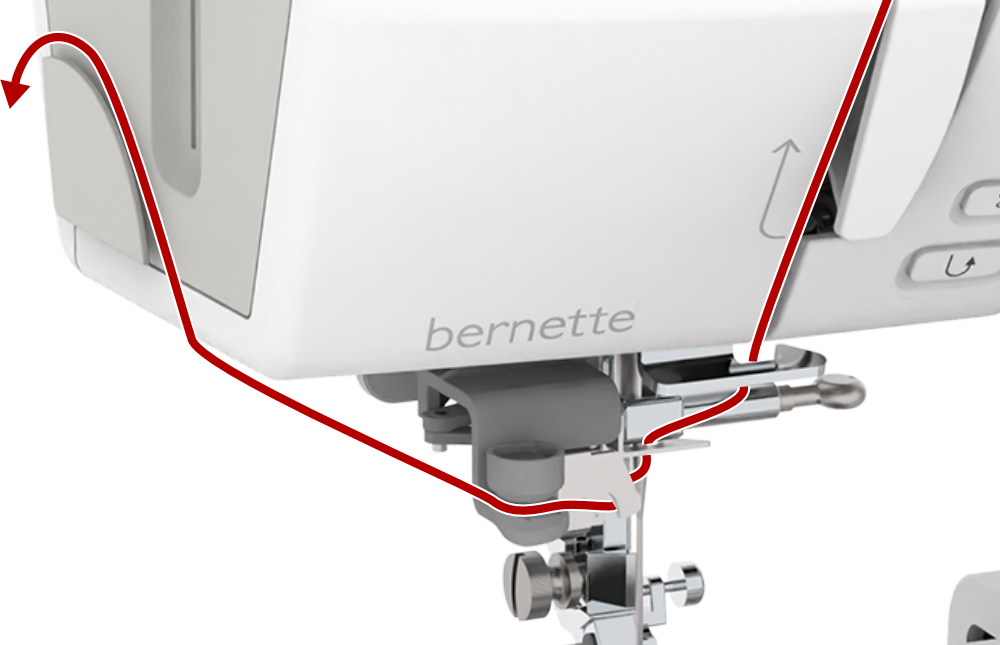
- Hold the thread on the left and the right, and pull it straight from the front to the back underneath the thread guide eyelet.
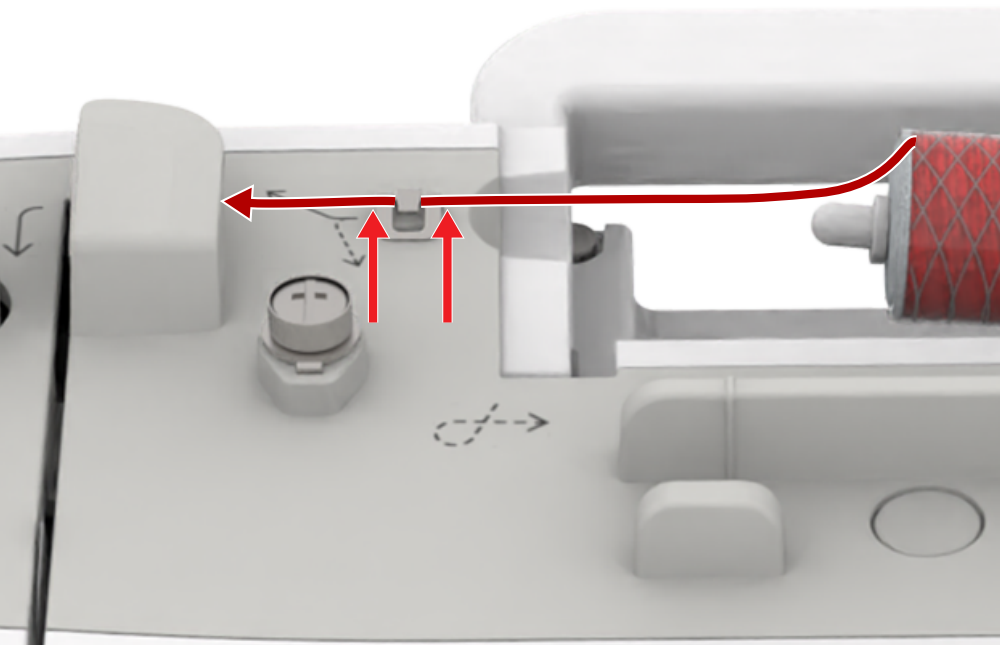
- Pull the thread underneath the rear thread guide to the front of the machine.
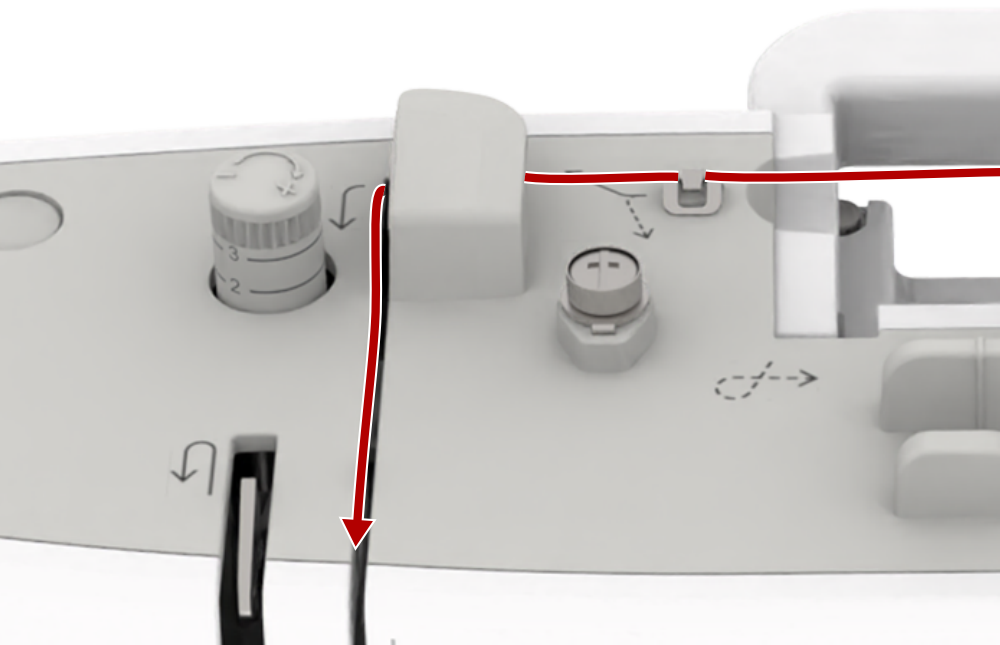
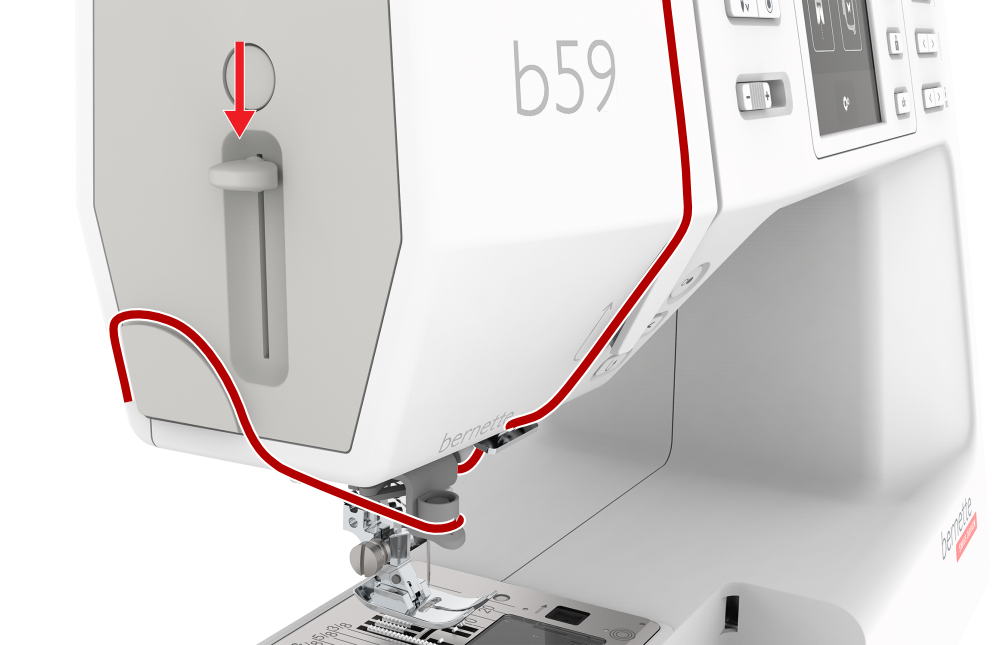
- Guide the thread on the right downward past the thread tension disc.
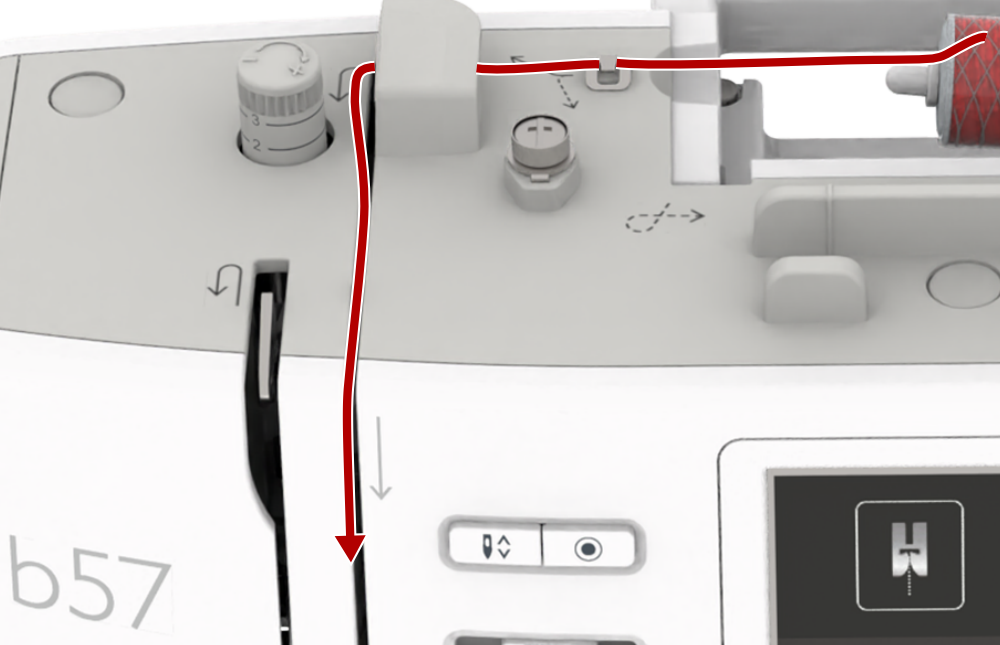
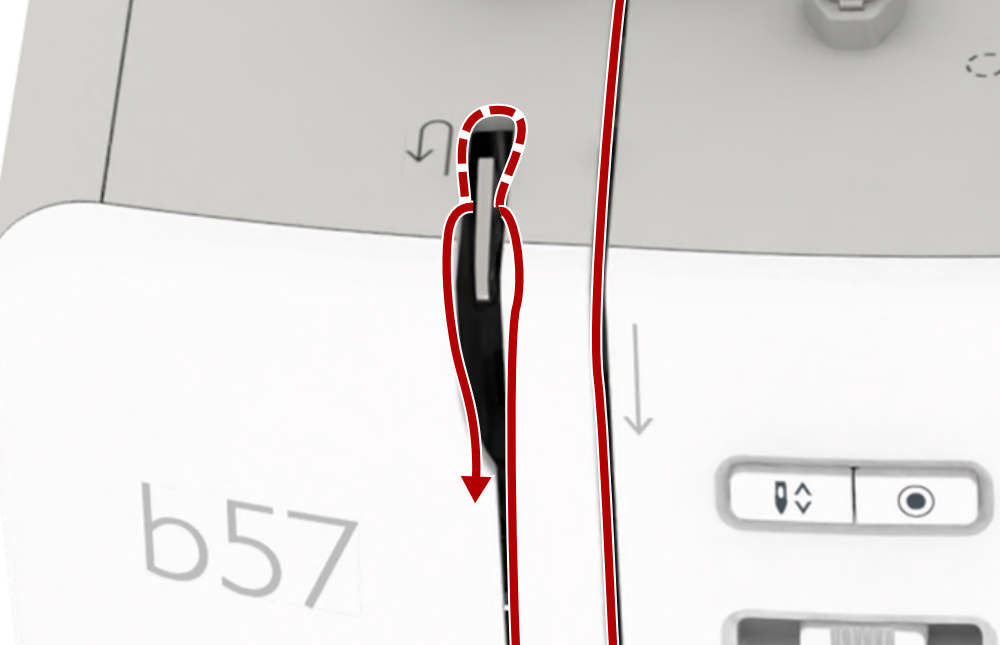
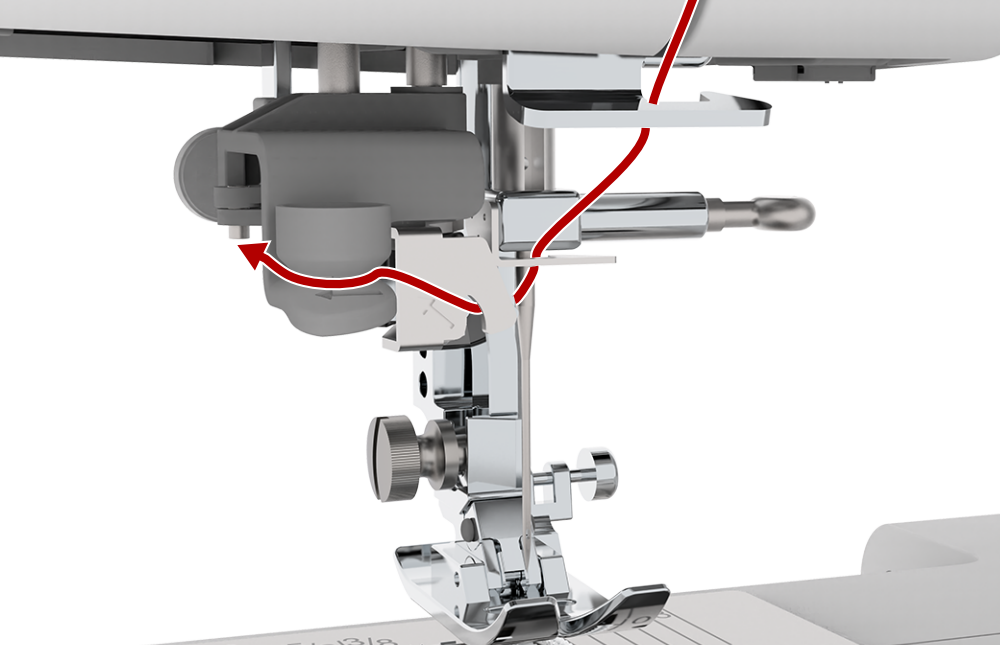
- Guide the lower thread upward around the thread take-up lever cover.
- Guide the thread through the thread take-up lever and guide it downward. Make sure that the thread is guided under the left side panel.
- Guide the thread from the right to the left behind the first thread guide in the needle area.
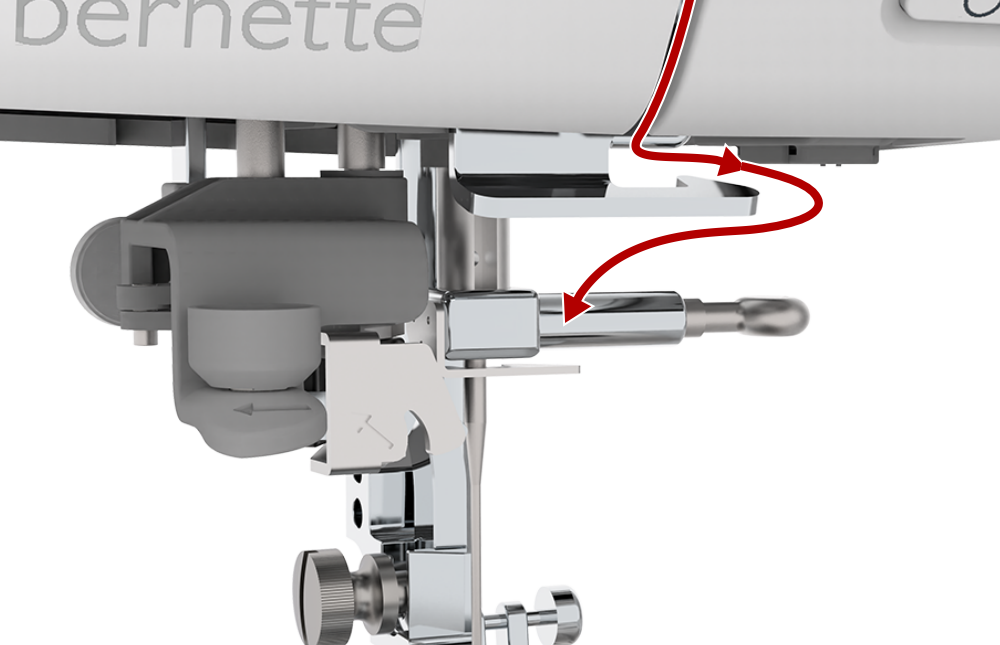
- Guide the thread from the right to the left behind the second thread guide in the needle area.
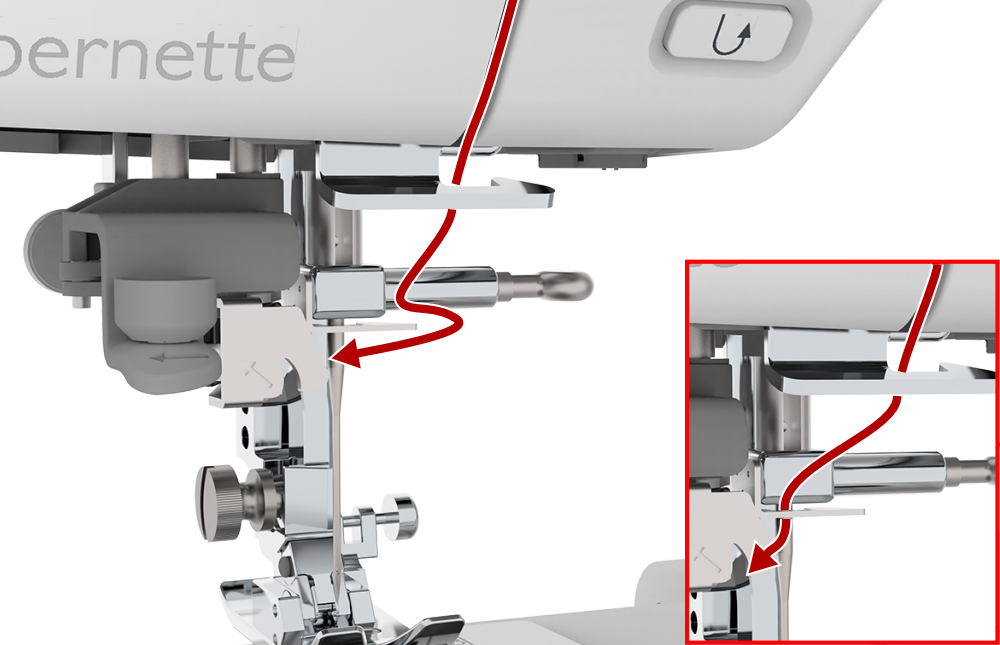
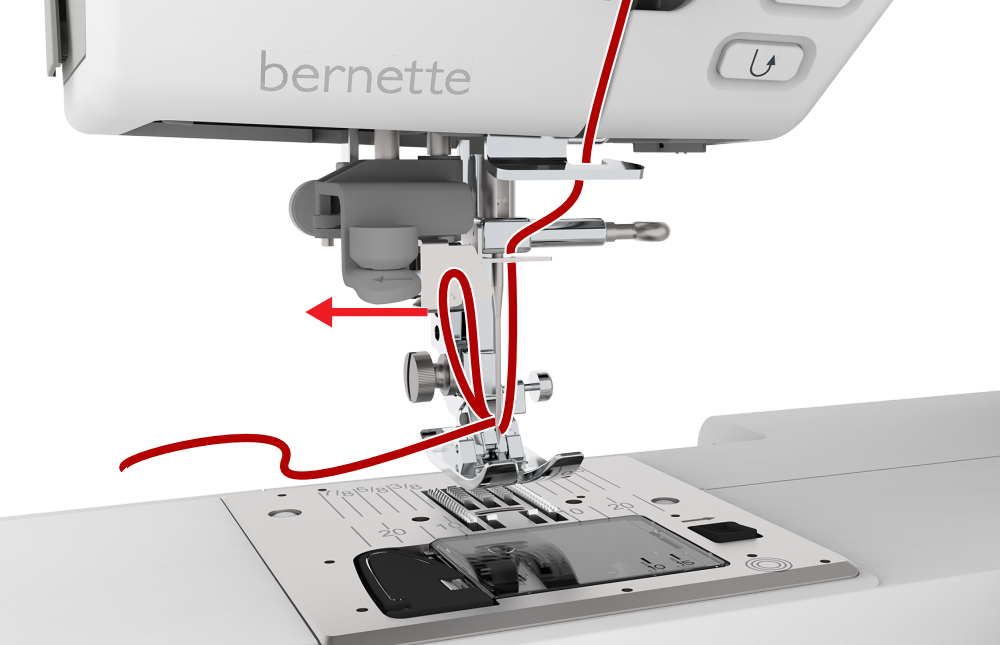
- Place the thread around the thread guide and pass it between the clamps.
- Cut the thread from front to back using the thread cutter.
- Press the needle threader lever all the way down and release it.
- The thread is pushed through the needle eye.
- Pull the loop of thread to the rear until the end of the thread is pulled through the needle.
- Unlock the screen.
- The needle is threaded.