Overview front controls
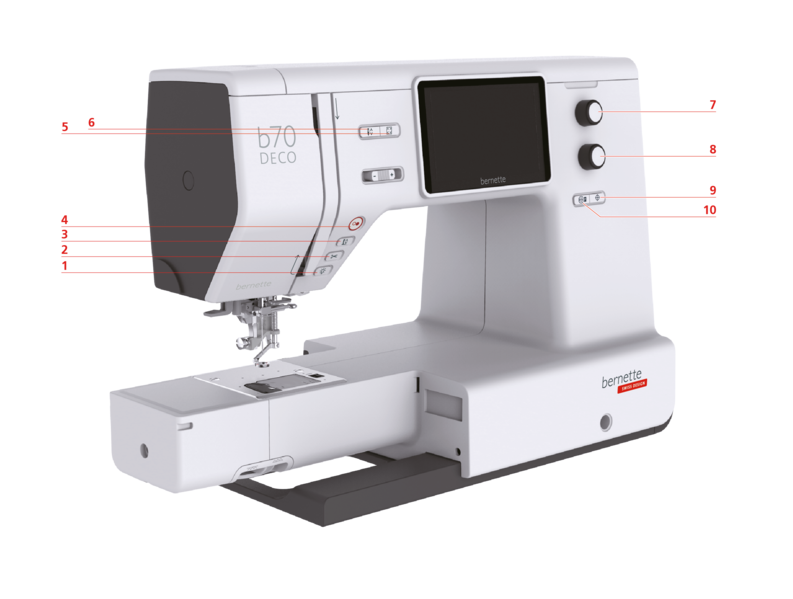
1 | Sewing Light |
2 | Thread Cutter |
3 | Presser Foot Up/Down |
4 | Start/Stop |
5 | Check Embroidery Design Size |
6 | Needle Up/Down |
7 | Upper Multi-function Knob |
8 | Lower Multi-function Knob |
9 | Center Design |
10 | Centering the Needle to the Embroidery Hoop |
Controls
Number | Operating Component | Name | Purpose |
|---|---|---|---|
1 |
| Sewing Light | To switch the sewing light on or off, press the button Sewing Light. |
2 |
| Thread Cutter |
|
3 |
| Presser Foot Up/Down |
|
4 |
| Start/Stop | The button Start/Stop is used to change the presser foot position and to start the machine.
|
5 |
| Checking the Motif Size |
|
6 |
| Needle Up/Down |
|
7 |
| Upper Multi-function Knob | With the Upper Multi-function Knob setting values can be changed in the embroidering and the Setup Program. |
8 |
| Lower Multi-function Knob | Use the Lower Multi-function Knob change the setting values in the embroidery and setup program. |
9 |
| Center Design |
|
10 |
| Centering the Needle to the Embroidery Hoop |
|