Manual Darning
Used for darning holes or worn areas in all fabric types.
If the thread is lying on top and a poor stitch formation results, slow down the movement of the sewing project. If there are knots on the wrong side of the fabric, move the sewing project faster. When the thread breaks, guide the sewing project more consistently.
- Remove the presser foot holder and attach the free motion foot (RX) to the presser foot holder bar.
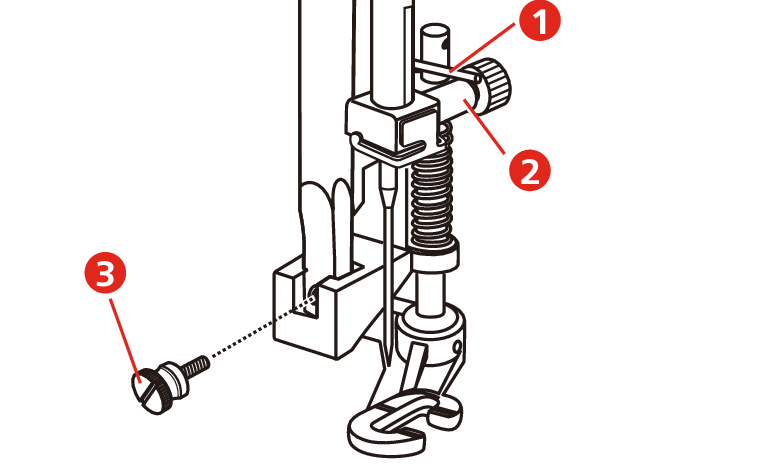
- The pin (1) should rest on the upper side of the needle clamping screw (2).
- Press the Free-motion Embroidery Foot (RX) firmly from below with your index finger and tighten the screw (3).
- Tap Practical Stitches.
- Select Straight Stitch No. 1.
- Lower the feed dog.
- Attach the Slide-on Freearm Extension Table.
- Hoop the sewing project in the round embroidery hoop (optional accessory).
- The darning area remains evenly stretched and cannot be deformed.
- Sew from the left to the right, guide the fabric evenly by hand without using pressure.
- Move in curves when changing the direction to avoid holes and thread breakage.
