Sewing a Buttonhole Automatically
- Attach the Buttonhole Foot with Slide (RJ).
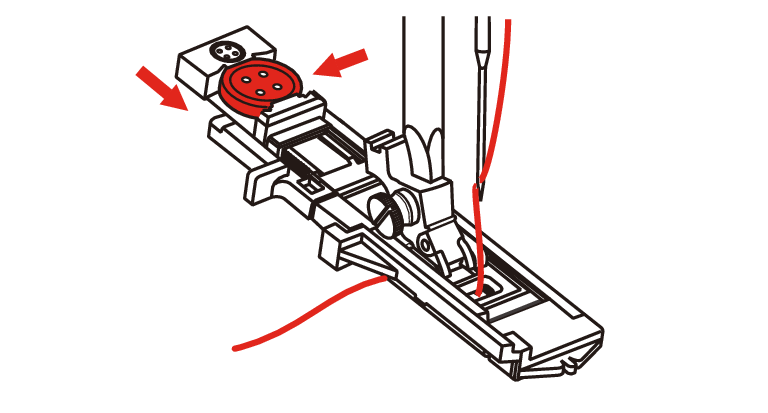
- Pull out the button holder plate and insert the button.
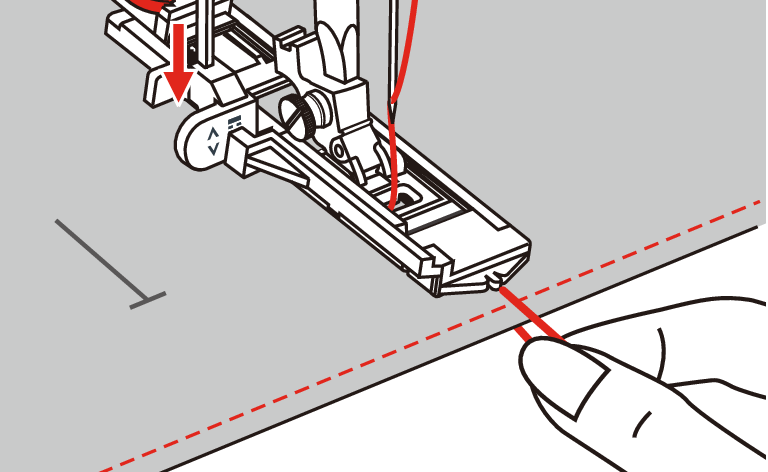
- Pass the thread through the hole in the presser foot and then place it under the foot.

- Tap Buttonholes.
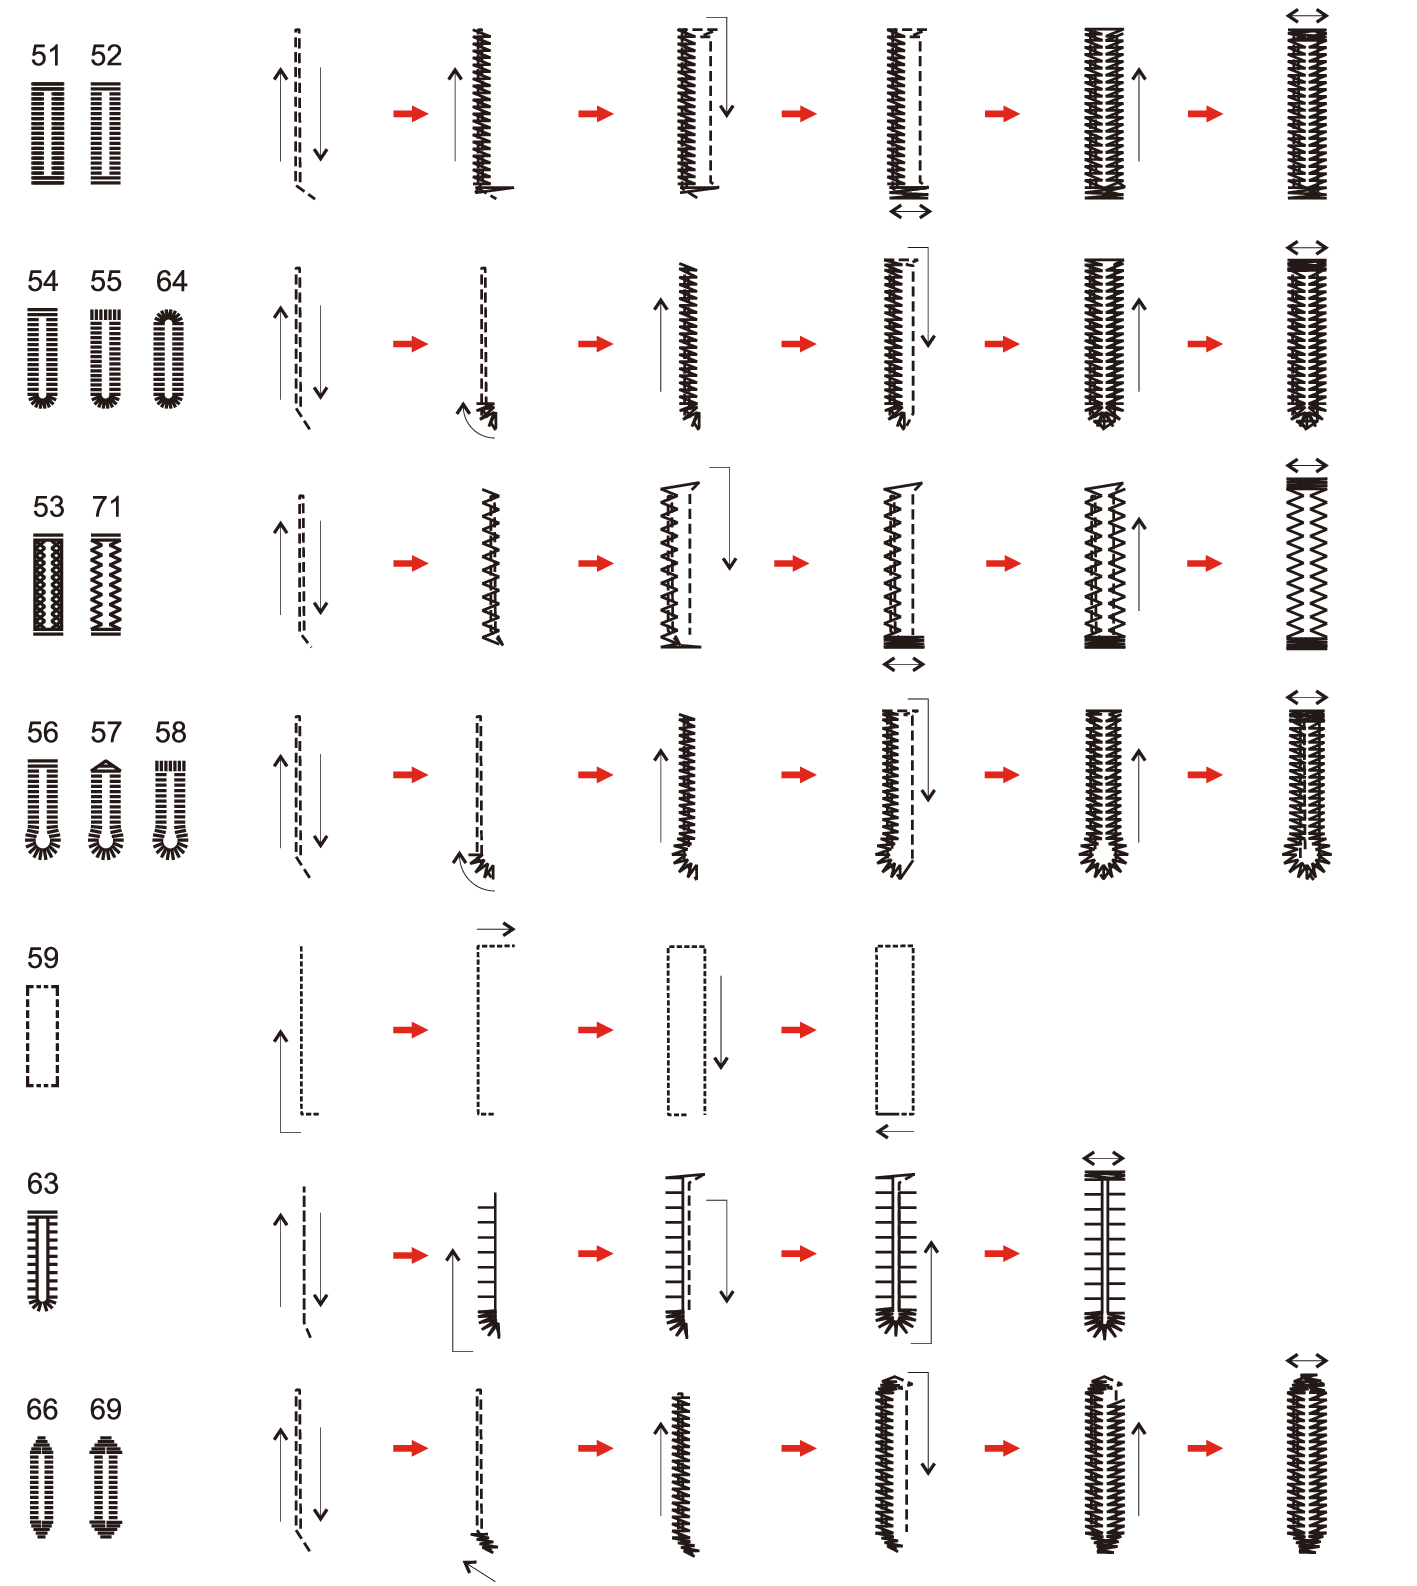
- Select the buttonhole stitch.
- Adjust the stitch width and stitch length to the desired width and density.
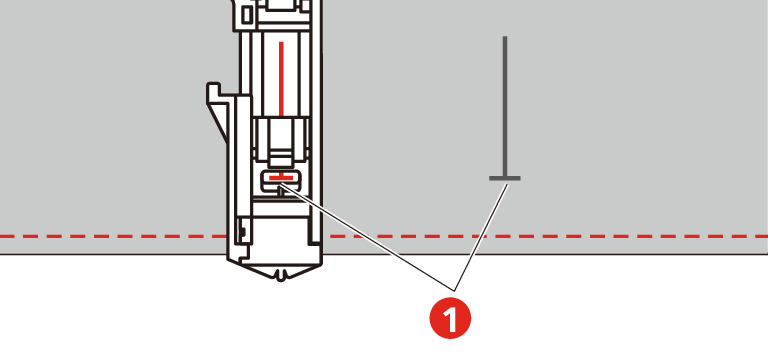
- Position the fabric under the presser foot so that marking of the centerline is aligned with the starting point (1).
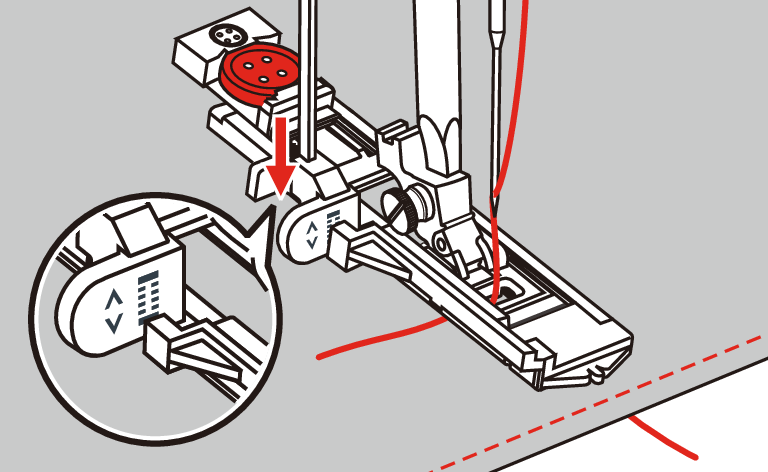
- Make sure that there is no gap between the presser foot tip and the plastic part.
- Press the button Start/Stop.
- While the buttonhole lever is raised, the display shows an error message to lower the buttonhole lever.
- Pull the buttonhole lever down as far as possible until it clicks into place.
- Hold the upper thread vertically to the buttonhole foot with slide and start sewing.
- After the buttonhole has been sewn, the machine automatically sews a securing stitch before stopping.
- The buttonholes are sewn backwards from the front of the presser foot as illustrated.
- Raise the presser foot and cut the thread.
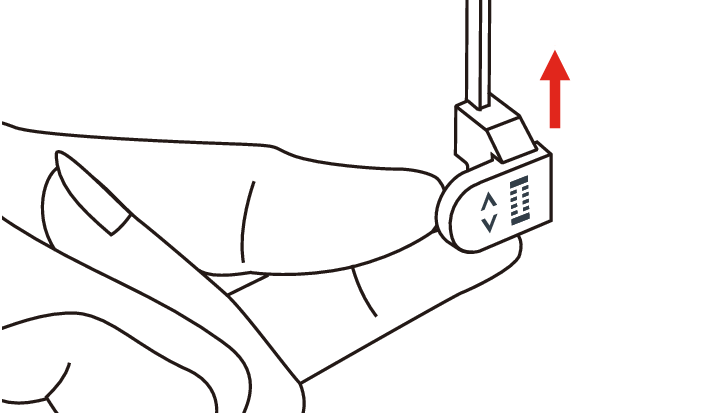
- After sewing the buttonhole, raise the buttonhole lever to the stop.
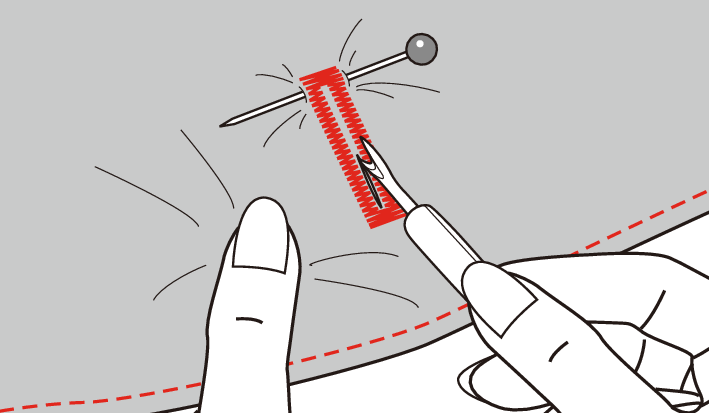
- Cut the buttonhole open and make sure that the beads are not cut on either side. Use a pin as a stop at the bartack to avoid cutting too far.